A May Wildcraft – Reishi and Lady’s Slipper!

4 Jun

I had the opportunity to travel north of Lakefield, Ontario last weekend to do some hiking and plant identification! We found many new plants that I did not have the pleasure of finding in flower last spring. Spring holds some of the most aromatic and floral-scented wildflowers, some of these being my favorites! Here are some of this week’s finds:

1. Trumpet Honeysuckle (not quite blooming)

Trumpet Honeysuckle(Lonicera sempervirens) – I love honeysuckles and this is one that I found growing in the forest’s edge in a small cluster. I am hoping to find another one in a few weeks when in full bloom and add its picture to  this entry. The way the opposite leaves almost make a cup around the flower cluster always catches my attention. These flowers are very pretty and have a wonderful, sweet scent, hence the name ‘honeysuckle’, a hummingbird favorite.

Edibility: None noted
Medicinal uses: You can juice the plant and use the juices externally for bee stings. The leaves were dried and smoked to alleviate asthma symptoms

2. Miterwort

Miterwort growing in a carpet of small snowflakes

Miterwort growing in a carpet of small snowflakes

(Mitella dphylla) – This little delicate flower was growing in the deep woodlands alongside Toothwort, White Trilliums, birch trees, and hemlocks. It can grow almost anywhere in our area but prefers moist soils. I like this plant because the leaves are mirrored symmetrically at the stem and also the way the waxy little flowers remind me of snowflakes.

Edibility: None noted
Medicinal uses: You can make an infusion from the leaves to treat fevers and as eye drops for sore, red eyes.

3. Yellow Lady’s Slipper

Yellow Lady's Slipper, close-up of the flower

Yellow Lady’s Slipper, close-up of the flower

(Cypripedium calceolus) – Lady’s Slipper is also known as ‘Nerve Root’, among others. What a find this was! I knew they grew in our area and are common in Europe, but this is something I have not found or seen outside plant books. The basal leaves were very camouflaged and as we were walking home through the forest trail, my sister’s partner, Kevin, told us he had found something. Katie and I immediately saw the ‘slipper’ and were so happy he found it. It does really have the shape of a shoe; I guess the name was a ‘good fit’…..

Edibility: None noted – can cause dermatitis to the skin and large doses can cause hallucinations
Medicinal uses: Lady’s slipper is most known for its sedative and relaxing effect on the nervous system. It is characteristic of this orchid to have a strong, bitter, pungent smell.  North American Indians used it as a sedative and antispasmodic to ease menstrual and labor pains and to counter insomnia and nervous tension. Nerve root might act as a drying agent to help shrink blood vessels.

4. Large Toothwort

Toothwort in full bloom with white flower clusters (very similar leaf and stem relation to Miterwort

Toothwort in full bloom with white flower clusters (very similar leaf and stem relation to Miterwort

(Dentaria maxima) – I found this plant growing in many areas of our forest walk, noting its similar posture to the Miterwort. A very nice show of white flowers carpeting the forest floor in small patches. This plant is very frost hardy (down to -20 degrees C.) and can be found near rivers and creeks, or in shady forests.

Edibility: Root – You can eat the root raw or cooked. Traditionally prepared by harvesting the pungent root and piled into a heap, fermenting for several days. This allows the root to sweeten where it is then boiled.
Medicinal uses: Again, the root is used as a ‘stomachic’ that helps tone the stomach, improving overall function and increases appetite.

5. Canadian Columbine

Canadian Columbine

Canadian Columbine

(Aquilegia canadensis -L.) – I first noticed Wild/Canadian Columbine when I was living in B.C. and first started to have an interest in wild flowers and identifying them. They really remind me of a nodding onion with the way they are so delicate, bowing down towards the ground. You can find these rosy plants in open or shaded forests and in rocky areas. I found this one in the picture above near a gravely road in the open sun, next to a coniferous forest. Their range covers most of North America. They can grow in acidic and alkaline soils, flower May to June, and grow about 2′ tall. Wild Columbine are perennials.

Edibility: I had no idea that the flower was eaten as a sweet addition to salads as they contain high amounts of nectar. Very tasty to snack on if you have them in your garden! The root can also be consumed
Note: Not known as toxic but other members in the Ranunculaceae family are known to be slightly toxic so caution is advised.
Medicinal uses:  The root is astringent and diuretic. It is chewed or made into a weak tea for the treatment of diarrhoea and stomach aches. The tea is used in the treatment of uterine bleeding. The boiled plant was used as a hair wash. The seed is anodyne and febrifuge. An infusion is used in the treatment of headaches and fevers (PFAF, 2012).

6. Wild Sarsaparilla

Flowering Wild Sassparilla and its root

Flowering Wild Sassparilla

(Aralia nudicaulis) This was an interesting find! At first glance I thought we had found ‘Dwarf Ginseng’, but after a closer look, we saw we had found another usable root, Wild Sarsaparilla. They like to be in dark, rocky, forested areas, found on the eastern half of North America. A perennial that grows just over a foot tall. You can notice the white cluster of flowers and the draping leaves that are taller than the flowers (unlike my mistake with Dwarf Ginseng).

Edibility:  The rootstock is used as a flavouring, it is a substitute for sarsaparilla, and is also used for making ‘root beer’. It is also used as an emergency food (usually mixed with oil), having a sweet spicy taste and a pleasant aromatic smell. A nutritious food, it was used by the Indians during wars or when they were hunting since it is very sustaining. Young shoots – cooked as a potherb. A refreshing herbal tea is made from the root. Pleasantly flavoured[222, 238]. The roots are boiled in water until the water is reddish-brown. A jelly is made from the fruit. The fruit is also used to make wine. The fruit is about 6mm in diameter (PFAF, 2012)
Medicinal uses: Wild sarsaparilla is a sweet pungent tonic herb that acts as an alterative. It had a wide range of traditional uses amongst the North American Indians and was at one time widely used as a substitute for the tropical medicinal herb sarsaparilla. The root is an alterative, diaphoretic, diuretic, pectoral and stimulant. The herb encourages sweating, is stimulating and detoxifying and so is used internally in the treatment of pulmonary diseases, asthma, rheumatism, stomach aches etc (PFAF, 2012).

Narceus Millipede in the forest

Narceus Millipede in the forest

The first blooms of Hemlock Reishi mushrooms

The first blooms of Hemlock Reishi mushrooms

We found these baby fruiting Hemlock Reishi mushrooms on the same Hemlock stump as we found the mushrooms last year. There were about 8-10 new blooms this year which is good to see that we did not over harvest the mushrooms last year! We will be going back to harvest one or two this summer (with photos to come).

Last years Reishi fruit

A Reisi mushroom that fruited last summer

Plant Information Sources:

Web MD – Nerve Root overview: http://goo.gl/tCkqp
Plants for a Future Organization, http://www.pfaf.org
Ontario Wildflowers Database, http://www.ontariowildflowers.com
Newcomb, L. 1977, Newcomb’s Wildflower Guide.
Knopf, A. 2001, The National Audubon Wildflowers; Eastern Region, Revised Edition.

Planting a garden; Our 2013 layout

2 Jun

This spring has come very fast! We are writing this about two weeks after we started to plant all the seeds and work with the soil. When May arrived, the weather shifted to spring, almost instantly! We are currently getting over a frost scare with snow and had to water the entire garden the other night and cover all the young seedlings with bed sheets and towels. The weather has been a little volatile here in Ontario this past two weeks but things are looking up and spending time in the garden has commenced.

As April rolled around, we started to get into planning mode and adapted the garden layout that I made last year to acquire some of the improvements we noted at the end of the season which you can read here. To get organized and prepared for the planting season and have a successful garden again this year, here is our list of steps that helps to get us started:

1. We set up a large seed list of all the seeds we currently had stored (How to properly store your herbs/seeds) and categorized them into medicinal herbs, culinary herbs, vegetables, and ornamental flowers.

This is our list of seeds we had saved for the 2013 growing season!

This is our list of seeds we had saved for the 2013 growing season!

It really helped put into perspective the diversity of our garden when we went to plant. This list is only our saved-seed list and does not include all the perennials and starters we already had in the garden. As you can see, we plan on growing more edible leafy greens this year and a few less medicinals. Also, planting more flowers for the insects and pollinators to eat – We have been working towards a blooming schedule that allows spring, summer, and fall flowers so there is a continual food source for bees and other insects.

2. Design a layout of your garden/yard space with rough dimensions to allow you to plan where you can plant your vegetables or flowers. The help of a ‘companion planting’ books helps out a lot!

This year was a much easier year to design the garden because last was a huge experimentation and educational growing period. We already designed our 2012 garden using the measurements of our backyard and then figured out an aesthetic and practical design that we both agreed on. You can see our garden layout here: Garden Layout 2012, 2013
– After the shape and size of the garden was determined, we started to look up the plants that needed full sun vs. partial shade. I recommend watching the sun’s path during full summer to see the clearance (or lack of) of any buildings or trees around the area. If in spring or fall, the path will be much lower to the south so account for a higher crest during mid-summer.
– We also use a companion planting book for all of our culinary herbs and vegetables to have as diverse a garden as possible! For example, planting garlic or onions around some greens or vegetables helps to deter aphids or other insects that could become a detrimental problem to your garden.

Garden layout 2013

Garden layout 2013

3. Till and supplement your garden soil with hearty, dark compost to nourish your plants!

The first real account of spring, at least for me, is when you can actually put your fingers into sun-warmed soil. This really signifies spring in my mind and is my sense of connection between the planning phase and the planting phase. We first started tilling at the end of April or first week of May, here in Ontario, Canada, and just worked in some high carbon leaf compost mixed with home-made vegetable compost (high in Nitrogen). We tilled and stirred the soil in our beds, mostly around the perennials, while adding a deeper trench of carbon rich leaf compost beneath the vegetable seeds.

tilling the garden bed with a hoe

tilling the garden bed with a hoe

The next step in the garden is the most fun – PLANTING! Once all the planning and organizing is done, we are so happy to be able to plant the seeds and transplant our starters in the earth and watch them grow.

Deep in the Forest Beneath the White Cedars

14 May

“Plant identification may sound mundane, but when you observe the hundreds of  variables and interconnections that single plant has with the surrounding ecosystem, it becomes quite magical.”

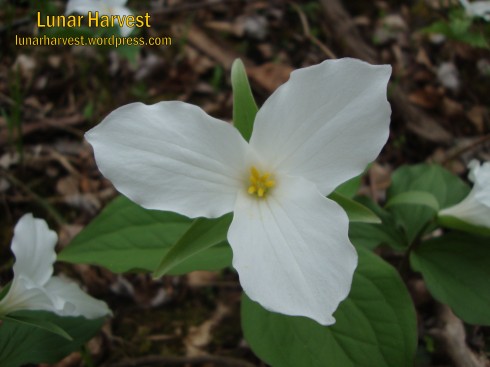
A patch of White Trillium we found at the forests edge, just next to a meadow

A patch of White Trillium we found at the forest’s edge, near a meadow


This week was a great chance to spend a few days and evenings in the woods, meadows, and swamps near my home. I have been so busy with the garden and work that I have barely had a chance to get into the forest and see all the new living plants emerging from the soil. It is still pretty early in the year, and the nights have been pretty cold this week, but a few new species of plants that I did not have the enjoyment of identifying last year were  some of the ones I stumbled across during my hikes. I have to say that in the past, hiking out into a mucky swamp or down a dark cedar trail, even walking through horse-fly guarded grassland, was not really my thing to say the least! I enjoyed the outdoors and being in the forest but for much different reasons. I enjoyed walking and looking at the trees blowing in the wind, smelling the damp leaves and decaying branches, and spotting any wildlife I came across. These things are still very close to me when I go into the forest, but a new element of observation really ‘clicks’ with me; wildcrafting and plant identification. Plant identification may sound mundane, but when you observe the hundreds of  variables and interconnections that single plant has with the surrounding ecosystem, it becomes quite magical. You learn to notice things like the type and number of pedals an opening flower has, its fragrant pollen, the colors and textures of the leaves and stems, the ecosystem in which it is growing, its population and overall health,  insects which are eating it, its mode of fertilization and seed mobility, and lastly but most predominantly- its full life-force. This idea is what has called me closer to herbalism and understanding (mostly the basics so far) the powers of local plant medicines. I like to routinely grab my bike, my harvest packs/bags, camera, and I.D. books, and enter the woods to see what I can catch coming to life! It is a great way to connect with nature and learn a few things while doing it.

Today I was visiting a store, an old used book store to be exact, and when my partner showed me a National Audubon Society Field Guide to North American Wildflowers, I was ecstatic! I spent over half an hour looking at the great detail of the pictures of wildflower petals, the majestic backdrops of the plants found all over the East Coast which featured numerous types of ecosystems, and I wished I was in each one of them. An urgency to visit all these wild places and smell each forest’s scent. The feeling that I get when I am looking through one of these plant field guides or gardening  design books  is a mixture between curiosity and amazement; I want to know where and when each plant will bloom, and most of all, the evolutionary processes and adaptations that occurred to make that plant what it is today. In other words, I am blown away when I try to understand the complicated relationships between predators and protectors of a particular plant; whether the plant adapted  to attract the pollinator or the other way around – that kind of question. It really is quite hard to understand, but the beauty is how well everything works out in the end.

A natural ecosystem, whether one that includes humans or not, is so much more complicated than one would assume. I have shared in the common view of nature as being trees and plants with a few bugs and birds and some natural weather fused in. The reality is unless you get down on your knee and peer deep into the ecology of even the soil beneath your foot, you will miss the very breath that is life on this planet. I have realized how much more there is to a simple forested path than just trees and pine needles covering the trail. There is a myriad of connections you can make that intertwines all the creatures and acts of physics within a wild-space.  For example, on my hike through the forest a few nights ago, my sister and I noticed what looked like a beaver damn in the river. We walked over to the water’s edge to see in fact it was just a burly shaped fallen branch. We happened to be standing in a tightly knit White Cedar forest with only a little light reaching us through the canopy. My sister pointed out that one of the cedar roots beneath our feet was erupting with little baby cedars! We followed a trail that was winding under the soil to the water’s edge. I noticed these were not Cedar trees at all, they were poplar – Balsam Poplars to be exact. We followed the emerging line back the other way, right up and over the root crown of the cedar beside us and abut 6 more feet to the base of a mature Poplar. It was erupting with basal shoots that were infants on a successful root that had made it to a source of sustenance, the river beyond us. I then became aware of the forces at work in this situation;

a) the immense number of emerging roots that became more noticeable as I took along the ground beneath me. A literal spider web, possibly a meter or more deep of roots, supporting a spongy, hollow forest floor.
b) a fierce competition of roots, like arms swarming and reaching over each other to fight for retreating ‘ground’ space.
c) the small clearing we stand has spots of light trickling in from above; the perfect location for these opportunistic Poplar shoots and they were growing steadily toward it.
d) The area was littered with fallen cedar limbs. The energy of the decomposing organic matter made by the cedars now fuels the explosive energy of the pervading Poplar; inviting it into its territory.

There were many, many other examples of associations that were happening while we assessed the forest floor, but this is only my interpretation. As an observer, the story was my own. Another could see the layout I explained and have a totally different understanding. That is the beauty of having your own experience in nature, learning from all the plants and insects around you. Just like us, each living organism has its own complex interactions and associations with its ecosystem.

Next time you are walking on a forest trail or even in your own back yard, stop to notice aspects beyond the flower itself. Look at the shape and color of the petals. Maybe a few quick questions like: How many petals does the flower have? What do the leaves feel like? Are they waxy or fuzzy? Are there any insects living or feeding on the plant?  There are many things we can learn from nature if we look a little deeper and I invite you to open up to this as well.

“The reality is unless you get down on your knee and peer deep into the ecology of even the soil beneath your foot, you will miss the very breath that is life on this planet.”

—————————————————————————————

This week’s plant-finds:

(Lunar Harvest can not take any responsibility for any adverse effects from the use of plants. Always seek advice from a professional before using a plant medicinally.)
Trout Lily in the forest

Trout Lily in the forest

1. Trout Lily

(Erythronium americanum) – This amazing little lily was blanketing the forest floor with waxy, dark leaves that are spotted (like a trout) and curled. It is native to Ontario and is edible! I came across these earlier in the spring so they have not fully opened, but this is what a Trout Lily looks like when it is fully blooming.

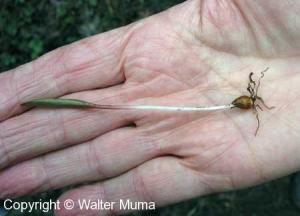
Trout Lily corm

Trout Lily corm

Edibility: at the base of the plant, there is a small ‘corm’ that is edible. I did not pick the ones I found as they are still very young and I wanted to leave them for birds and other wild creatures, but this is a picture of what a corm of the Trout lily looks like. It is said to taste similar to cucumber.
Medicinal Uses: None noted

2. Yellow Downy Violet 

(Viola pubescens) – This awesome little

Yellow Downy Violet

Yellow Downy Violet

yellow violet was all over an east facing hill that was opening is small areas. This one is not fully open, but you can see the fuzzy, round toothed leaves and the typical vertical black marking on the lower petal. These violets are in the Viola family and found in dry, mixed deciduous forests. They bloom in the spring months, April through May.

Edibility: Wild Violets are noted as edible! You can eat the flowers and leaves – great for salads and tea,  syrups and vinegar!
Medicinal Uses: None noted

3. Field Pussytoes

(Antennaria neglecta) – These little white shoots have been something on my to-find-list and I

Field pussytoes ready to bloom!

Field pussytoes ready to bloom!

stumbled across them last night in a grassy field. The name alone is quite interesting as are the flowers themselves. I have always come across this plant in my plant identification book, but have never really noticed it in the past here in Ontario.

Edibility: None noted
Medicinal Uses: Not used very often anymore, but once used for coughs and for the gall bladder. The plant is very rich in mucilage which makes it very valuable in the treatment of chest complaints. It is also used in the treatment of liver and gall bladder complaints.

4. Periwinkle

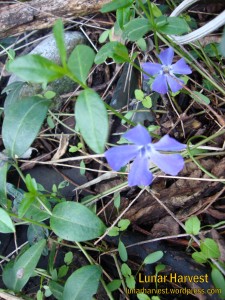
(Vinca minor) – I have seen these little guys in my

Periwinkle Flower

Periwinkle Flower

neighbors garden before, a waxy ground-cover looking plant that has a little blue/violet flower in the early spring. Periwinkle is VERY invasive and should not be spread or introduced outside the home garden. It grows in many areas of North America, predominantly on the Eastern coast. We found this growing in a dark Locust grove as a ground cover mixed with Wild Grape and deciduous trees. It likes to line moist forest floors.

Edibility: None Noted
Medicinal uses: Periwinkle is an Antispasmodic, Astringent, Bitter and Sedative  tonic, among other important things. It contains a potent alkaloid called ‘vincamine’, which is extracted and used pharmaceutically as a cerebral stimulant and vasodilator. Its real use, since its discovery, is treating heart problems and dementia, which is due to low levels of blood reaching the brain.

5. Marsh Marigold

(Caltha palustris) – This swamp and stream-bed loving flower is known to light up wet areas in April-May with its bright and beautiful yellow blooms. I had seen this in the spring many times and wanted to document it. The Marsh Marigold definitely needs wet, saturated soil to thrive and can also grow in a soil based water garden. I stumbled across this only because it is almost impossible to miss if you are hiking around an area that has and wetlands or streams…

Marsh Marigold in damp creekbed

Marsh Marigold in damp creekbed

Edibility: This plant can be very TOXIC if eaten raw. It contains the toxin glycoside protoanemonin, which can be harmful if sap gets on your skin. It is best to stay away from the older parts of the plant, like lower stem and basil leaves. Cooking is the best method to deactivate the glycosides; Boil in water, then change water repeat, 3 times! I don’t think I would risk eating this plant as most of the nutrients would be gone after a triple boil, but it is good to know for survival.
Medicinal uses: Since the whole plant is an irritant, caution is advised! Externally used to treat warts, or boiled and mashed to create a poultice for sores. A tea made from the leaves can act as a diuretic and laxative.

6. Coltsfoot

(Tussilago farfara) – Coltsfoot is the first plant I tend to see rising; a very eager flower which

Coltsfoot flowers in full bloom

Coltsfoot flowers in full bloom

gladly provides sustenance for early and competitive bee populations. When this stalk emerges, it really reminds me of Pinesap (Monotropa hypopitys) due to the texture on the stem, especially before it blooms.

Edibility: Contains alkaloids that can be toxic to the liver in large doses. Smaller doses are safer. There are many uses for Coltsfoot, most of the plant is edible! The flowers and buds are good raw/cooked and have a light anise flavor. The leaves can be boiled (also rinsed after boiled to help lower the bitterness). A tea can be made from the leaves and flowers and again has an anise flavor. I found out that you can dry and burn the leaves to create a salt alternative!
Medicinal uses: Coltsfoot is a noted for its great Antitussive and Demulcent abilities, helping to relieve coughs and expelling mucus. There are possibilities of toxicity when using in higher amounts, especially dried flowers. Coltsfoot is also used as a whole body tonic.

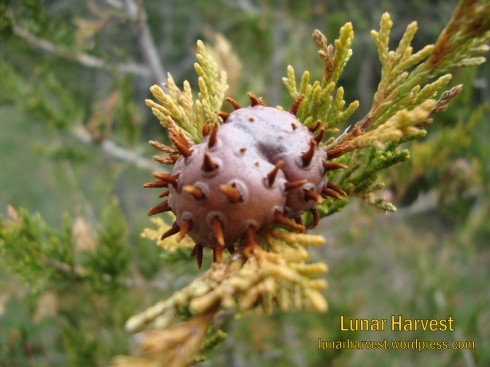
We came across some other common flowers in the area like Wild Strawberry, White Trillium which is our provincial flower, and an interesting fungus growing on some white and red cedar trees; Cedar-Apple Rust, as shown below. Thanks for reading my post, hopefully I can blog more weekly finds like these in the future!

Cedar-Apple Rust on a Cedar tree

Cedar-Apple Rust on a Cedar tree

A patch of White Trillium we found at the forests edge, just next to a meadow

A patch of White Trillium we found at the forests edge, just next to a meadow

Wild Strawberry Flowering

Wild Strawberry Flowering

Adam D.

Plant Information Sources:
Plants for a Future Organization, http://www.pfaf.org
Ontario Wildflowers Database, http://www.ontariowildflowers.com
Newcomb, L. 1977, Newcomb’s Wildflower Guide.
Knopf, A. 2001, The National Audubon Wildflowers; Eastern Region, Revised Edition.

The Stinging Nettle (Urtica dioica); A love-hurt relationship

11 May
Stinging nettles in the back garden

Stinging nettles in the back garden

This year is an exciting year for our established garden perennials. We have been nurturing some for the past 4-5 years. Echinacea purpurea, and nitrogen-fixing legumes like Alfalfa (Medicago sativa) and a strong medicinal I have loved to use for years, Marshmallow (Althaea officinalis) are but some. It wasn’t until last year that I really started to understand and appreciate the wondrous nutritive abilities Stinging Nettles have. I have seen them in damp forests many times, especially behind a house I spent a summer at in British Columbia, Canada. They were thick, 3-5 feet tall, and they sure let you know if a bare arm or leg grazed them while walking past! After reading about nettles in herbalism books and literature, I was excited to grow these in our back garden in case we couldn’t find many wild bunches. We planted some nettle seeds in a few designated areas of the garden last year that would suit their growing needs (nutritious, damp soil, partial to full sun, away from central paths). They awoke early this year and are doing great in the garden, ready to be harvested and made into some delicious tea and soups. The ideal time to harvest Stinging Nettles is between May and June, picking only the new tender top growths, before the plant flowers. You can save and dry any extra leaves for future use.

“The leaves of the plants have stinging hairs, causing irritation to the skin. This action is neutralized by heat or by thorough drying, so the cooked leaves are perfectly safe and nutritious. However, only young leaves should be used because older leaves develop gritty particles called cystoliths which act as an irritant to the kidneys.”

Benefits and Medicinal uses for Stinging Nettles:

– Alterative, cleansing tonic and blood purifierNettle scientific
– Treats hayfever and allergies
– High in iron; great for treating anaemia
– Acts as an astringent, diuretic, and a stimulating tonic
– Helps blood clotting, dandruff, asthma, and hypoglycemia
– Very nutritious as a food that is easily digested and is high in minerals (especially iron, calcium, and silicon) and vitamins (especially A and C)
– Known to aid osteoarthritis; reducing pain in joints by applying topically over sore area; has been shown to reduce their non-steroidal, anti-inflammatory drugs (NSAIDs)

  • For Rheumatism, the fresh young leaf tops were traditionally picked and rubbed or ‘beaten’ onto the skin. This is called urtification, actually induced a potent  irritation to the skin that is far worse than just brushing the hairs across the skin. Urtification of Nettles works in two ways; first it acts as a counter-irritant, bringing more blood to the area to help remove the toxins that cause rheumatism. Secondly, the joints that are inflamed and sore from the Rheumatism are eased by the plants natural occurring formic acid.

“The juice of the nettle can be used as an antidote to stings from the leaves and an infusion of the fresh leaves is healing and soothing as a lotion for burns”

Preperations:

how to pick nettles using the "taco" technique

how to pick nettles using the “taco” technique

Tisane/Herbal Tea Infusion: For a basic tea mixture, each cup of boiled, filtered water, add 1 tsp of dried herb (you can use 2 Tbsp or more if you are using fresh herb). Cover the pot and let set for 30 minutes. This is the ‘infusion’ method to make nettle tea.

For our home-harvested and brewed tea, we hand-picked the nettles in our back yard, picking the young tops as shown. A technique shown by superfood expert David Wolfe, is to grab under the leaf and curl it up like a taco, thus not touching the hairs on the top of the leaf or the barbs on the stem of the nettle plant. Then pluck the leaf off and set into the basket, or even set into the mouth (not to touch the lips or front of the tongue).

We then snipped into smaller pieces (some people prefer to rinse the nettles before adding to tea) and put the water on to boil. Once the water was rolling, we took it off the heat and added the nettles. Cover and let steep for 30 minutes or longer. You can let sit over night and reheat in the morning for an even more potent tea –  This technique let the water cool with the herb in it, therefor extracting different nutrients at each decreasing temperature stage. The end result will be a much darker and potent tea.

After the tea has cooled enough to drink, enjoy! You can add other green or fragrant herbs with the nettles like mint or chamomile if you wish for a more calming or sweet tea.

Baths: This is good for sciatica. Soak a large amount of Stinging Nettle plant material, including the root, in cold water for 8 hours or overnight. Then boil the herb for 10-15 minutes and add to the bathtub. Soak in the herbs for as long as you feel comfortable. This may also be used as a foot soak.

Shampoo wash: Place one half cup of the dried herbs in a huge 5 liter pot. Bring the herbs to boil slowly. Remove from the stove and keep covered for an additional 10 minutes. Add in some shaved olive oil soap and bring to boil. Cool to a warm mixture and wash your hair with this.

Soups: The flavor of green, young nettle tops is a delicious taste to add to soup recipes. A simple recipe could be

Stinging Nettle Soup

1 lb of young stinging nettle tops
4 cups of Vegetable Broth
1/4 cup of Brown/Basmati Rice
1 medium white onion, diced
1 Tbsp extra virgin olive oil
1 Tbsp sea salt
pepper to taste

Directions

  1. Bring a large pot of water to a boil with 2 teaspoons of salt. Drop in the stinging nettles, and cook 1 to 2 minutes until they soften. This will remove most of the sting. Drain in a colander, and rinse with cold water. Trim off any tough stems, then chop coarsely.
  2. Heat the olive oil in a saucepan over medium-low heat, and stir in the onion. Cook until the onion has softened and turned translucent, about 5 minutes. Stir in the rice, chicken broth, and chopped nettles. Bring to a boil, then reduce heat to medium-low, cover, and simmer until the rice is tender, about 15 minutes. Puree the soup with an immersion blender, and season to taste with salt and pepper.

.

Sources:
http://www.pfaf.org, Urtica dioica
http://www.naturalnews.com, 
Stinging Nettles: So Many Cures that You Will Lose Count. 2012

http://www.umm.edu, Stinging Nettle:Steven D. Ehrlich, NMD, 2011.
Nettle Soup recipe modified from: allrecipes.com/recipe/stinging-nettle-soup

Spring-time garden greening

20 Apr
catching not only a honey bee, but another wasp too

Our first Honey Bee and a friend

Everbearing raspberry buds ready leaf

Ever-bearing raspberry buds ready to leaf

It has been a long time coming but the ground is thawing and our soil is breaking with small green sprouts, reaching for the sun. I have been itching to touch the soil the past few months so a daily walk through the mucky garden paths subdues my anxiety. The major difference we have this year over last is that many of our herbs were perennials so we actually have many garden surprises popping up each day. I have taken a look through the leaves and covered spaces to see what is coming to life. Here is what I have found:

This month my sister, Alissa, and her partner Kevin, arrived from a winter in Mexixo and will be staying with us. They will be helping us out in the garden as well as enjoying the bounty of home-grown, organic veggies. We plan on really expanding the greens and vegetables and hopefully berry canes. We were a little late on planting our starters in the basement but thanks to the warm weather forecasted in May, we will be able to start planting outside (we live in Ontario, Canada so our growing season starts a little later). One of the many things we have starting to grow is Stinging Nettles (Urtica dioica). It is one of my favorite herbs as it so nourishing for the blood, liver, and body. It is also a powerful pain reliever  when you apply or rub the stinging hairs to a sore or inflamed area of your body.

The soil is warming up and we are getting ready to plant! We have been busy organizing and planning our garden, building our 2013 layout plan which we are excited to share with you in a few weeks! With the accompaniment and advice of our companion planting guides, along-side our growing experience from last summer, we have made some major improvements that we hope help our yields and  growth. We will be posting our next blog soon about the accounts of our May planting as well as some of our planting methods we used. Thanks for reading,

Adam D.

Common Edible & Medicinal Ornamental Plants

1 Apr

Illustration of Rosa rugosa

Hopefully the vast and intimate relationship between human beings and plants is not something that I have to elaborate on extensively. For the sake of not writing a novel (which I apparently love to do despite my own protests) I am going to broadly categorize the relationship that we have with plants into two categories: aesthetics and practicality. Plants are incredible and unique organisms, just as we and every other living thing is. They are fundamentally different from other forms of life based on a myriad of chemical and genetic principles.

For thousands of years human beings have gone to great lengths to enhance the physical appearance of plants in order to satisfy our seemingly endless hunger for the beautiful, strange and interesting. In some cases, we have completely removed some plants from their natural habitat and context and altered them to such a degree that this new ‘cultured’ and ‘designed’ organism exists for us and by us. Ornamental cultivation marks a crucial and defining aspect of our relationship with the plant world, something that has changed both us and them forever and doesn’t show any signs of slowing down.

However, if you change your perspective to one of practicality and realism, you discover that a plant cannot be eaten or used no matter how beautiful or aesthetically pleasing it may be. This defines the other realm of our physiological relationship with plants; one of reverence and respect for their service of sustaining us as well as all other terrestrial life. Despite this, the world of horticulture and agriculture just like that of medicine and food is drawn by a very thin line that is only slightly blurry at best. Unbeknownst to many, there are a wide assortment of plant species that are more commonly associated with the ornamental end of the scale but also possess edible and medicinal uses. I present to you a few very common plant species that are largely regarded as being ornamental but also offer edible and medicinal uses that can help you to even further enjoy what these plants have to offer. What could be more satisfying than growing and nurturing a plant that provides you with both beauty and aesthetic appeal as well as sustenance and nourishment; food for both the mind and body?

Rose of Sharon blossoms

The rose of Sharon (Hibiscus syriacus) is a fast growing shrub or small tree indigenous to East Asia that is closely related to both the medicinal plants marshmallow, Althaea officinalis, (not the artificially colored and flavored confection composed mainly of sugar and corn syrup) and red hibiscus, Hibiscus rose-sinensis. Rose of Sharon is very common in the horticultural trade and a truly staggering number of cultivars are available which has produced a nearly endless range of color, form and texture.

The plants establish quickly, can tolerate summer drought, and do best in a sunny, open position with plenty of space. They can be trained into small trees or multi-stemmed shrubs, or allowed to grow into a full, sprawling bush which seems to be their natural preference. For the purpose of rose of Sharon’s edible and medicinal properties, all cultivars can be used although it is probably best to stay away from the double-flowered and heavily bred varieties since the external and internal chemistry and genetics of the plant have been altered and this could affect how they are processed and assimilated by the body. If you do not have Rose of Sharon already growing in your garden, I would recommend trying to obtain seeds of the the straight species.

The often large, 5-petaled flowers in their entirety are edible, including the small green appendage (calyx) which attaches the flower to the twig from which it emerges. They have a fresh, crunchy and slightly mucilaginous (slimy) texture and a mild and gently sweet flavor. They make wonderful garnishes for any dish, although are particularly at home in salads or the petals separated and layered in sandwiches. The flowers are usually produced for several weeks, if not a month or more, from mid summer to early fall. Both young (when still folded and emerging from the bud) or old (slightly wilted) flowers can be used. I enjoy them best raw, although they can also be cooked and incorporated into casseroles or added to soup or stew as a thickening agent.

The young, light green and irregularly lobed leaves as well as tender shoots are also edible, but they quickly become tough and fibrous. Both the leaves and flowers can be made into a tea which has similar properties to the aforementioned Altheae officinalis. The mucilaginous texture that you experience when eating the raw flowers and leaves is very soothing to an irritated throat and digestive tract, reducing inflammation from irritation or infections. Ulcers, irritable bowel conditions and constipation are just some of the conditions that can be treated by regularly drinking a tea from or consuming the flowers and leaves of this versatile as well as stunningly beautiful plant.

Siberian pea tree flowers

The Siberian pea tree (Caragana arborescens) comes to us from north-east Asia, where it can be found growing in a wide range of conditions including dry, gravelly slopes and moist, rich valley bottoms along streams. This very adaptable and resilient species was originally introduced to North America as a food crop, planted along trade routes by early migrants who traveled from the areas where this plant is native. Over time, other virtues and characteristics of the Siberian pea tree were recognized and exploited. Once considered food, this plant is sold in bulk nurseries to be planted in groups on the slopes of recently constructed overpasses and junctions as a soil stabilizer. It is also commonly planted as a windbreak and to mark the property boundaries of agricultural operations. Unfortunately, the knowledge of this plant as a provider of food and nutrition has largely been abandoned, which is a terrible shame.

As if the name wasn’t enough of a hint, The Siberian pea tree is in the legume family Fabaceae (formerly called the leguminosae) and has the capacity to fix nitrogen into the soil thereby enriching and improving its capacity to nurture other plant species. In addition, the species is remarkably cold hardy (down to at least -15 degrees C) and can tolerate long periods of summer drought and high-humidity once established.

I find that the beauty of this species is its seasonal versatility. I have encountered few plants, that have not been intentionally cultivated for the purpose of being edible crops, that provide food throughout the growing season. In early to mid spring, dense clusters of bright yellow pea-shaped flowers are born on short stalks. These can be harvested (with care to avoid the paired spines at the base of each compound leaf)  quite efficiently and eaten fresh or added to salads and soups for color and flavor. As would be expected, the flowers have a pea-like flavor that is quite agreeable and lends itself to being incorporated into various dishes.

A couple of weeks later, around late May or June, those flowers that remained after your first grazing have been pollinated and have begun to grow into beans. They are long, narrow and a couple of inches long. When still vibrant green and flexible, they can be eaten raw in salads, cooked in casseroles, roasted with other vegetables or used in any one of the ways that you would use green or pole beans; with which the flavor is also quite comparable with. Further still, in August and July, the left-over pods will turn brown as they mature and split open to reveal beans. These can be sprouted and eaten, or soaked and boiled to be used in sauces, bean salads or mashed.

Given that these plants can flourish with complete and total neglect once established (it is fully hardy and drought tolerant), they are an asset to an edible and medicinal landscape. It is appropriate to keep in mind that this species is mildly invasive, at least in the southern greater Toronto area (specifically Hamilton and Burlington) where I have observed it first hand spreading downwards on slopes where it is planted. The mature seeds, when released from the pods, simply roll down the hill and germinate a few feet down slope from the mature colony.

Ramanas rose hips

The Ramanas Rose (Rosa rugosa) is a relatively new wild edible treat for me. Around where I live, they are commonly planted in the small, crowded ‘green islands’ in the middle of parking lots. Ramanas roses can tolerate a modest amount of salt spray and poor air conditions, making them suitable for cultivating in such conditions. However, I would advise not to harvest from these plants as the soil that they are growing in probably contains completely inappropriate amounts of petroleum derivatives, inorganic road salt and likely also garbage. Better to harvest seeds or cuttings from these plants and grow them in your yard or a pot as part of a balcony or porch garden!

Originally growing in clustered colonies in sand dunes and gravelly piles along the edges of the sea in South Korea, Japan and Eastern China, this species was selected for cultivation mainly because of its hardiness and it’s ability to be breed with other rose species. Therefore, there are many double-flowered and sterile cultivars and breeds of this species available in the horticultural trade, although for the most part I have only seen the straight species planted in public places.

Naturally, the flowers have light pink to dark purple slightly wrinkled petals with a faint sugary-sweet fragrance and a white center. Like other rose species, the flower petals can be eaten raw, added to salads or sandwiches, used in potpourris or soaked in water to make rosewater, a very expensive but easily made natural food flavoring. Of course, be careful to avoid getting pricked by the vicious thorns that, although soft and rubbery when young, quickly harden and become a threat to wild harvesters. A tea made from the flowers has a particularly profound affect on the liver and spleen, helping to cleanse.

My favorite aspect of this rose is the fruit that is produced. Rose fruits are referred to as hips, and are biologically very similar to the morphology of an apple or pear, with an astringent skin concealing lusciously sweet flesh surrounding a cluster of seeds in the center. Many rose hips are small and very fiddly to collect and eat, but the hips of the Ramanas rose can be between 2 or 3 centimeters in diameter. The layer of flesh is also surprisingly thick, and has a wonderful texture and flavor.

The hips are produced in clusters from the start of flowering which occurs in mid to late spring. If the hips are harvested as soon as they are ripe in mid-summer, another flush of flowers may produce another crop of hips in autumn. As the hips ripen, they turn orange and finally a bright, deep red. Once the skin starts to wrinkle slightly, they can be picked and eaten out of hand, preserved as jam, made into a fruit compote, or mushed and incorporated into a sweet and savory sauce. Rose hips are famously rich in vitamin C, as well as vitamins E, A, flavonoids and essential fatty acids, which may be important in preventing the formation or spread of various cancers.

Even the seeds of Ramanas rose can be used. Although tough and bitter when eaten out of hand (not to mention the little hairs which cover the seed’s surface and can make swallowing difficult and uncomfortable) the seeds can be rinsed and then ground into a powder which can be added to soups, smoothies, oatmeal, or just about anything. The seeds are rich in minerals and have an impressive amount of vitamin E – and there is more to come! In late spring or early summer,  new shoots from established plants can be seem emerging from the ground. This species aggressively propagates itself in this way and can form dense hedgerows if left to it’s own devices. One way to control its spread is to eat the new shoots! When flexible and tender, they can be cut at base level and steamed, baked or cooked just like asparagus.

What’s incredible is that this is only 3 plants out of hundreds of commonly ornamental cultivated plants which have the capacity to feed and nourish the world. I encourage you to explore and diversify; introducing into your body a wide variety of unorthodox crops, and therefore unique combinations of nutrients, minerals, active enzymes and the like, producing an individual that is just as healthy and diverse as what they eat. I am all about biodiversity in the forest, biodiversity of the mind, and biodiversity of the plate. I believe that a lot of the common ailments that plague the industrialized world result in part from continually eating the same types of food over and over again and for extended periods of time. Embrace plant diversity, both agricultural and ornamental, and continue to step over the perceived and arbitrary boundary that exists between these two terms. Happy learning, growing and feeding!

Building An Herb Shelf; 6 Tips on Storing Herbs

19 Mar

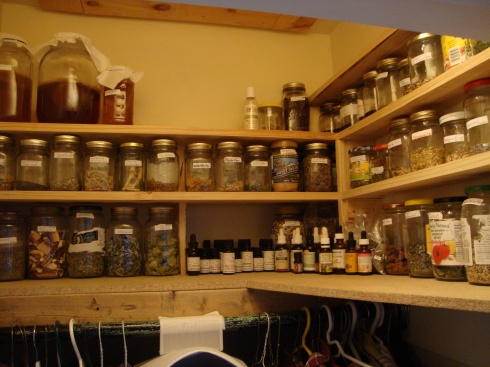
This weekend was perfect to get a project done that I have been planning and thinking about for a long time; where to safely put all of our herbs and plant medicines? I wanted to make sure a few standard requirements were met when answering this question. I have put together these six standard requirements for storing herbs which are the basis to maintaining high quality medicinal and nutritional qualities. By keeping the conditions of your storage area optimal for preservation, you can get the longest shelf-life and potency from your plant medicines

a) Store herbs in glass jars with a tight fitting lid
-Glass is a great container for herbs (mason jars are what I use) and can be recycled from soups, canning, and certain food products. The largest benefit is they do not leach plastic by-products, like plastic bags or containers do. Another benefit is creating a tight seal and not allowing oxygen or moisture to enter, minimizing oxidization or mold on the plant material which will drastically lower its shelf life.

b) Keep out of direct sunlight
– Light can destroy valuable vitamins and phytochemicals within the herb and can lower the potency of your dried herbs. Storing in a dark cupboard or closet (in my case) is a great way to seal out any ultraviolet rays.

c) Keep the medicines cool and away from any heat sources
– Storing herbs away from a heat source is very important. Just like cooking your food, several enzymes and nutrients (mostly vitamins) are destroyed when heated. This also quickens their expiry date. When drying the herb, it is best to either hang or set-to-dry to reduce the exposure of heat. Another way to shorten dry-time  is using an adjustable temperature dehydrator. Keeping the temperature low, and humidity low, the plant material will dry out faster with less chance of mold and will retain higher amounts of nutrients.

d) Organize alphabetically or by group
– In the picture of my herb shelf, I have created an example of how I would like to organize my shelf eventually, into simple areas that make searching for particular items easier. You can

A rough organization by group for my closet herb-shelf

A rough organizational grouping of my closet herb-shelf

organize it any way that  you want. Some health food stores organize their herbs alphabetically for the sake of simple referencing. This is perfect for storing at home too. I like my layout to be set up in groups so if I need a few herbal ingredients to treat a certain ailment, they are all grouped together. This comes in handy when I need a little extra help with anxiety or getting to sleep, I can grab my favorite herbs from the Nervine and Sedative sections. Grouping does save a lot of time once you get to know your layout.

e) Easy access is important if you need to find things quickly
– The way that I have the shelf set-up is that it is at head level. This way when I am am standing in front of the shelf, it is easy to see all the labels and reach everything I need. I also have a light mounted on the wall above the shelf which I can turn on when I need to see inside the dark closet. I installed a ladder on the wall to the left so I can reach the harder to access areas at the very top of the shelf. If you have the shelf near the floor you have to bend down and there is generally less light when you are trying to view labels. Since you are trying to keep sunlight out of your storage area, having a small light to see in this dark space is key.

f) Properly label and date when the herbs were purchased or harvested
-It is a very obvious idea, but putting large and visible labels on the fronts of your containers helps to know what you have in the jar. Dating helps to determine how long the herb has been on the shelf, allowing you to rotate or replace. I like to add if it is organic, sustainably harvested, or if I was the one who wildcrafted/grew the herb. I even keep my home-grown/harvested herbs in a separate container than the store bought herbs. That way I can appreciate the tastes and potency of our garden saved herbs, knowing I watched them grow and nurtured and harvested them myself – it makes the tea/remedy much more special.

DSC04854

Herbs with tight-fitting lids, in glass jars, labeled

DSC04853

Label shows I wildcrafted it, the herb name, and date dried

.

.

I have been continuously reading into Rosemary Gladstar’s , “The Art and Science of Herbology”, a course that I am currently completing. At the starting of this course she mirrors these requirements, outlining a set of four tests that can be completed to assess and measure the health and potency of the herbs you grow or those that you purchase. The four tests are as follows;

Color: The herb that you dry should be vibrant as the day you picked the herb. If you harvest mint leaves or lemon balm, they should be alive and green after they are dried. Herbs that are yellow/orange like Calendula should be bright and not see-through or pale. Roots hold true to this rule; they should be almost the same color and vibrancy as first harvested. Echinacea root should be a grey-brown, Yellow Dock a yellowish brown, Golden Seal should be a bright golden-green color.

Smell: A good marker for quality is its smell, not necessarily a good smell, but a distinct smell that represents the herb’s quality. Some herbs are bitter, some sweet smelling, some very ‘bad’. A notorious ‘bad’ smelling herb is Valerian,  having the resemblance of dirty socks. If you purchase or have Valerian stored, higher potency will accentuate a VERY dirty smelling pair of socks. This is actually a good thing… Another herb Rosemary points out is Peppermint. If you have a very good stored mint, the uncapping and smelling should make your nose tingle and eyes sting. Each herb is different, some are ‘green’ smelling, some are fragrant like flowers and pollen. Take note on the vibrancy of different brands, varieties, and suppliers, remembering the effects each herb has on your nose and senses.

Taste: The power of the herb when placed on the tongue is a great indicator of the life-force and value of the plant. Again, not all herbs will have a good taste, so how much you like the herb is not the measurement. When you taste the herb it should be fresh. You should judge the potency by how strong, distinctive, and vital they are as well as how much they ‘rouse your taste buds’.

Effect: The last measurement of quality and potency is to actually try the herb to see its effectiveness. We know that for much of human existence, our species has had a knowledge about plant medicine and certain plants are good for certain ailments.  If your herb is not working for you, it is wise to first question its quality and potency of the herb, followed by if it is really the right remedy for the situation.

Building My Herb Shelf

When I decided to build this shelf, I did a lot of measuring and designing on AutoCAD to create a plan that fit the different sized jars and tincture bottles I had. I also took into consideration the access to the attic hatch in the closet ceiling; not to block the door. I used reclaimed wood from old shipping containers that I dismantled and planed clean and smooth. The cupboard is floating, not attached to the walls at all, just kept in place by a tight fit and 4 screws up from the main shelf it is sitting on; this way I can remove it if  I wanted it elsewhere. The main dimensions are around 40″ long by 34″ wide. The shelves are double width at the bottom and single width, 4.5″ deep, at the top and on the right side. I am definitely not a carpenter by any means and this project took me about 4-6 hours to complete, not including the AutoCAD design which I made a little over-complicated for such a small shelf and simple concept. The drawing did however come in very handy for measurements and allowed me to play around with spacing before cutting any materials.

DSC04857

View of the right shelf

DSC04856

View looking into the closet (front)

Herbs and Spices
A common place for people to store their culinary herbs and spices is beside or above the kitchen stove… The heat rises towards under-side of the cupboard they are stored in, potentially warming the herb. With heat can come moisture from kettles or boiling water. If herbs are not kept sealed and kept in a proper jar, they have the potential to become moldy or go bad.  Moving the spices away from the stove or elements so they can maintain a cool and consistent temperature will help you keep cooking with strong, rich herbs.

Other tips: 
-Make sure if you are purchasing herbs from a store, they are sustainably harvested or certified organic. Some lower grade herb manufacturers spray their herbs with fungicides and pesticides to keep the product longer.
– If you are harvesting herbs for home use, make sure you harvest them sustainably and responsibly! There is a large index available that lists herbs and plants that are over-harvested and at risk for extinction in the wild. (Some USA endangered species are listed on the USDA Natural Resources and United Plant Savers). The best way to ensure you are getting a good quality medicinal herb is to actually grow it yourself. You then know its growing conditions, its harvest date and shelf life, that it was harvested at its prime, and if there were any chemicals involved or not.

-Adam Deck

Heavy Metal Detoxification – Herbal and Natural Chelators

11 Mar

As we watch the environment around us get more and more polluted, it is imperative that we protect our organs and living cells from the damage these environmental toxins cause. When I say ‘protection’, I mean using the simplest and most basic form our bodies have adapted to, by a process of millions of years of evolution and environmental stimulation. I definitely do not mean a way that humans invented in the last century;  a slurry of  chemicals and compounds that contribute even further to the overwhelming load of acquired toxins in our tissues.  The form I am talking about is as simple as using the very foods we eat and the herbs we see growing around us! I have compiled a select list of herbs and natural compounds that I have researched for helping remove heavy metals from the body.

Heavy metal poisoning can be a very harmful malady. It is a major cause of hormonal imbalances, cancer, thyroid problems, neurological disturbances, learning problems, depression, food allergies, parasites, etc. The two most common types of heavy metals are mercury and lead. Both are used industrially and in many products in our daily lives. It is no wonder certain cancers and other health problems associated with heavy metals have risen due to increased exposure. Here is a list of some common ways humans are exposed to mercury and lead.

Lead:

  • Soil: Lead particles that settle on the soil from leaded gasoline or paint can last for years. Lead-contaminated soil is still a major problem around highways and in some urban settings.
  • Household dust: Household dust can contain lead from lead paint chips or from contaminated soil brought in from outside.
  • Pottery: Glazes found on some ceramics, china and porcelain can contain lead that may leach into food.
  • Toys: Lead is sometimes found in toys and other products produced abroad.
  • Traditional cosmetics: Kohl is a traditional cosmetic, often used as eyeliner. Testing of various samples of kohl has revealed high levels of lead.
  • Lead was also once a key ingredient in: gasoline and is still used in batteriessolderpipes, roofing materials 
  • Lead in paint: Lead paint was used up until 1978 for homes, children’s toys, furniture, and more. Most lead poisoning in children results from eating lead-based paint chips.
  • Water pipes
  • Imported canned goods: lead solder in food cans is banned in the United States but it is still used in some countries.
  • Lead pipes: brass plumbing fixtures and copper pipes soldered with lead can release lead particles into tap water

Mercury:

  • Power-plant combustion, of which coal-fired power plants are the largest aggregate source (40% of U.S. mercury emissions in 1999). 
  • Amalgam Fillings
  • Gold production and mine tailings. The three largest point sources for mercury emissions in the U.S. are the three largest gold mines. 
  • Non-ferrous metal production, typically smelters.
  • Cement production
  • Waste disposal, including municipal and hazardous waste, crematoria, and sewage sludge incineration.
  • Caustic soda production
  • Batteries and florescent light bulbs
  • Volcanoes (A natural source, non man-made)

“Mercury is found in many rocks including coal. When coal is burned, mercury is released into the environment. Coal-burning power plants are the largest human-caused source of mercury emissions to the air in the United States, accounting for over 40 percent of all domestic human-caused mercury emissions. EPA has estimated that about one quarter of U.S. emissions from coal-burning power plants are deposited within the contiguous U.S. and the remainder enters the global cycle. Burning hazardous wastes, producing chlorine, breaking mercury products, and spilling mercury, as well as the improper treatment and disposal of products or wastes containing mercury, can also release it into the environment.”

– www. medicinenet.com

.

1. Cilantro (Coriandrum sativum) – leaf and stem

http://weekendcountrygirl.blogspot.ca/

weekendcountrygirl.blogspot.ca/

“An article by M. Aga, et al, published in the ‘Journal of Ethnopharmacology’ in October of 2001, investigated the effects of cilantro on mice with high levels of lead in their bodies. Another chelating agent, DMSA, was used as a control to validate the results of the experiment. After 25 days levels of lead were significantly decreased by the cilantro, suggesting that cilantro has lead suppressive activities.”

– Christy Callahan

Many people know it as a peppery herb in Thai or Mexican food, or something green for garnishing a tasty dish. Cilantro is also known as Chinese Parsley.

Using a simple green herb that grows abundantly in the herb or vegetable garden to remove these heavy metals, among others, is a very inexpensive, tasty, and healthy alternative to man-made chemical compounds. Cilantro has been found to chelate (remove) heavy metals like mercury, aluminum, and lead from the body. In fact, it is believed to cross the blood-brain barrier and actually remove these metals that were deposited within the brain and may be one of the most effective agents in doing this. Some people take cilantro tinctures along-side Chlorella (or other high-chlorophyll containing greens) to assist the process of removing metals from the blood, and out the body. A major study has been done by Dr. Yoshiaki Omura, Director of Medical Research of the Heart Disease Research Foundation, where he fed patients Vietnamese soup (the major ingredient being cilantro) and measured their urine. He saw an increase in the output of mercury which demonstrates that it had been removed from the body in higher concentrations. He also found that after feeding this cilantro based soup to patients with mercury poisoning, they successfully removed a large amount of the toxin out of their bodies within three weeks. You can add a handful of cilantro to salads, as a garnish in dishes, or dried and powdered in capsules.  A simple and delicious recipe for cilantro ‘Chelation’ pesto:

“Cilantro ‘Chelation’ Pesto”

4 cloves garlic
1/3 cup Brazil nuts (selenium)
1/3 cup sunflower seeds (cysteine)
1/3 cup pumpkin seeds (zinc, magnesium)
2 cups packed fresh cilantro (coriander, Chinese parsley) (vitamin A)
2/3 cup flaxseed oil
4 tablespoons lemon juice (vitamin C)
2 tsp dulse powder
Sea salt to taste

Process the cilantro and flaxseed oil in a blender until the coriander is chopped. Add the garlic, nuts and seeds, dulse and lemon juice and mix until the mixture is finely blended into a paste. Add a pinch to sea salt to taste and blend again. Store in dark glass jars if possible.

2. Zeolite Clay

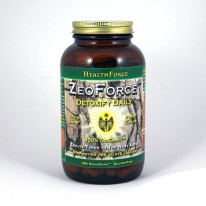
Zeoforce capsules

Zeoforce capsules

Zeolite is a naturally forming microporous, aluminosilicate mineral combination that is found in rock deposits around the world. I purchased zeolite clay as it has been scientifically proven to bond and chelate to heavy metals as it has negatively charged ions and attracts the positive charge of heavy metals such as mercury, cadmium, lead, arsenic  and others. The same holds true for other agents I mentioned and is the backbone of how they bond and chelate these metals from the liver and other bodily tissues, directing them towards the kidneys. We ordered this clay in capsule form, just for the sake of not having to taste it. It is grey and looks a little like concrete powder. After taking one or two capsule per day for over a month, we ran out. We then ordered some in the powder form and the smell and taste are much stronger. Mixing it with water tastes like crushed gravel… I feel like there is a great similarity to the benefits of Benonite clay, another clay which also helps to bond to toxins in the body and excrete them. I took this in conjunction to the other herbs and greens I listed.

3. Chlorella and Spirulina (Blue/Green Algae)

http://helpyourselftohealth.blogspot.ca/2010/12/the-antioxidant-power-of-spirulina.html

helpyourselftohealth.com

Chlorella and Spirulina or some of the oldest, single-celled algae organisms on the planet. Chlorella contains proteins and peptides which are compatible in our bodies to bind to these substances and carry them out of the body. The key point to purchasing a brand or grade of algae is to understand the water or source of where they were grown. The same role that all these other chelators play with binding to positively charged ions, such as heavy metals, takes place with spirulina and chlorella. If the water they are grown in is exposed to high levels of toxins, pesticides, herbicides, etc., they will bond and accumulate contaminants in the final product. That is why it is very important to source organically, and if you can, away from China/Japan sourced algae due to their industrial infrastructure and Japan’s radioactive output (fukushima). When you open a container of either of these ‘greens’ powders, you will instantly smell a fishy, seaweed taste, and a little ocean as well (chlorella being a little stronger). A great way to consume these powders is in a smoothie or mixed in a vegetable/fruit juice. I usually take about one or two Tablespoons/day in my morning smoothies for the chelation properties as well as the chlorophyll, proteins (over 62% by weight), minerals and vitamins.

4. Yellow Dock (Rumex crispus) – leaves

http://cms.herbalgram.org/virtualtour/human.html

cms.herbalgram.org

Another common herb that helps with heavy-metal detoxification is yellow dock. This herb, a potent alterative and blood purifier, has deep, strong roots that absorb lots of nutrients and are very high in iron. Unlike Gobo or common burdock, whose roots are used as alteratives, yellow dock’s young leaves are used. You can add them to salads after boiling and rinsing the leaves multiple times to remove as much oxiliac acid as possible. The alterative abilities of dock are helpful with binding to heavy metals and stimulates the liver to release heavy metals and process through the kidneys. I harvested some seeds I found and identified wild last season. We hope to have a small planting in our garden for easy access, although it grows very rampant and is easily identifiable in the wild.

– I have tried using these for chelation as I have spent a long portion of my youth painting for summer jobs and doing construction work. I realized how serious it is to have absorbed so much potential lead dust and other heavy metals from this form of work. I decided to get my blood tested for heavy metal levels and the results came back very low. Although far below the “low” level on the blood test, there was still a number. I felt uneasy about  knowing I had lead floating around in my blood and felt it was simple enough to include some herbal helpers in my diet. These are all easy to find and incorporate into ones daily diet and they all have many other amazing benefits built in for your health!

Adam D.

.

Sources:
http:// www. mayoclinic .com/health/lead-poisoning/FL00068/DSECTION=causes
http:// www. medicinenet .com/mercury_poisoning/article.htm
http:// www. rawfoodinfo .com/articles/art_cilantroremheavymetals. html
http:// www. livestrong .com/article/194198-cilantro-as-a-chelator/
http:// en.wikipedia .org/wiki/Mercury_(element)#Releases_in_the_environment
http:// www. naturalnews .com/027942_cilantro_heavy_metals.html
http:// www. custommedicine .com.au/health-articles/zeolites/
http:// public.naturallynovascotia .com/learnaboutherbs/viewherb.asp?herbid=31
http:// www. umm. edu/altmed/articles/spirulina-000327.htm

Tried and True Herbal Cold Busters

9 Mar

This is a little bit of a spontaneous post, but I felt the need to share one of my recent experiences. I caught a cold on Monday and by Thursday I’m feeling a whole lot better, a great deal faster than I anticipated. I always get a sore throat first when I catch a cold, so when I feel that coming on I know that I’m in for a bad time for the next few days. As soon as I knew that my body was starting to become weakened by an infection I reacted with some of the herbs and folk remedies that I have read about. I am going to try to keep this article straight and to the point, although given the fact that my 2 previous articles were quite lengthy, I have my doubts [Editor’s note: those doubts were accurate; I completely and totally failed at making this article short and concise. Oh well!] because I tend to ramble quite a bit. But we’ll see how it goes. Anyhow, listed below are the few herbs and other natural produces that I decided to use to prevent from getting totally sick and had enormous success.

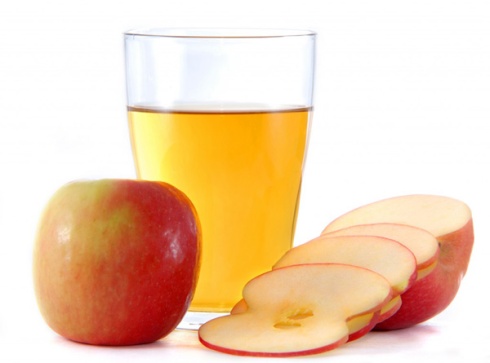
apple cider vinegar
Apple Cider Vinegar
: I received a book from my partner entitled “Folk Medicine” which is written by D.C. Jarvis (a physician) and published in 1958. This book is pretty much the bible for honey and apple cider vinegar, illustrating how both can cure a wealth of common ailments and help one to ultimately achieve a healthier and longer life. Even though some of what is stated in the book may be up to debate regarding it’s scientific accuracy, many of the things it tells have proven over and over to work. I usually drink apple cider vinegar, just a gulp or two a day, because it is rich in minerals and nutrients that are preserved by the bacterial culture. I like the taste, and have no problem getting it down although understandably it may be too strong and acidic for everyone’s tastes. Diluting it in juice, water or tea  is a more enjoyable way of enjoying the benefits of cider vinegar.

So how does cider vinegar help when you’re sick? I found it to be the absolute best cure for a sore throat. Just sipping the vinegar brings relief which lasts for a good long while. My guess is that the vinegar creates an environment in your throat so acidic that it damages the virus/bacteria that are causing the discomfort. Or perhaps the answer lies in the bacterial culture in the vinegar somehow affecting the invading infection? Just some thoughts. But how ever it works, It works big time. Sore throats are my least favorite common health problem. Thoroughly unenjoyable. Pro tip: Organic apple cider vinegar can be found in the natural product section of most grocery stores, as well as at natural health food shops or the occasional pharmacy.

For the do-it-yourself-er: If you buy good quality cider vinegar you will notice that it contains the ‘mother’, which is a long chain of bacteria that appears as a dark, cloudy mass somewhere in your bottle or jug. By preserving the mother, apple cider vinegar can be endlessly propagated by simply adding apple cider (the drinking, sweet flavored kind) to a remaining amount of cider vinegar which contains the mother. After waiting a certain amount of time (look it up), the mother will convert the regular apple cider into more vinegar. So theoretically, you only have to buy it once if you are creative!

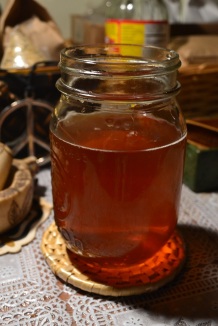
Honey: You are definitely going to want to invest in raw honey. Even better if it’s organic. The best quality product provides the best support you are giving to your body. I encourage you to try to buy local honey as well, since our local bees could really use some love and support. Unpasteurized honey has more enzymes, protein and other delicate nutrients that are often eliminated when the honey is pasteurized  When ever I remembered, which turned out to be 3 or 4 times a day, I would take a big spoonful (or 2) of honey. It coats your throat and is anti-bacterial, and really helps to sooth a sore throat. Honey is a valuable, nutrient and vitamin dense super-food that is loaded with natural sugars and I find just helps for the infection to weaken faster and with less lingering complications. I also added it to my tea, smoothies and anything else that I ate or drank that would be appropriate.

Capsicum annuum

Capsicum annuum

Cayenne Pepper: Chances are, from what I have experienced, you have this in your house. It’s a common spice, made from the cured, dried and ground-up fruits of hot pepper plants, which are cultivars of the species Capsicum annuum, a native of southern North America and northern South America. Fun Fact: This same species is also the ancestor of the sweet green and colored bell peppers. Cayenne peppers contain a compound called capsaicin which is responsible for the hot, burning and numbing sensation that is produces in the mouth and throat. It is a very valuable medicinal plant and can be used to treat cardiovascular disease, topical skin infections, relieve pain, and much more.

What’s important when you have a cold is cayenne’s antibacterial, analgesic (pain-relieving) and decongestant properties. The powder when dissolved in warm water (the spicier the better!) really helps to loosen the mucus in your sinuses so that it can be expelled from the body, as well as sooth and eliminate sore throats. I drank this twice in the evening, on Tuesday and Wednesday night, mixing a heaping teaspoon of powered cayenne with 250ml (standard measuring cup) of freshly boiled water. I had to sir quite a bit to keep the powder evenly suspended, but it’s not a big deal. The heat that you feel after swallowing the cayenne also encourages perspiration; the skin is porous and has the capacity to flush toxins from the blood by dissolving it in the water that your body releases as sweat. Of course, incorporating generous amounts of cayenne to your food does not need an explanation and is another excellent way to enjoy it’s benefits. Cayenne is invaluable if you have any sort of sinus/respiratory problem, and would be absolutely one of my top 10 easiest to find and most useful herbal remedies.

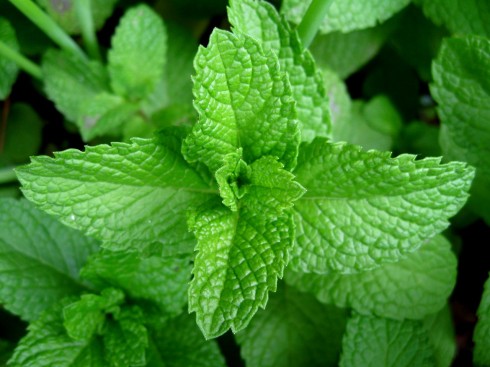
peppermint

Peppermint: This is certainly an herbal product that you don’t have to look very hard to find, it is so common that most grocery stores carry it at pretty cheap prices. However, I would go for peppermint that is sold at bulk herb stores or other establishments that sell natural food and healing products. Even better would be to grow your own mint or harvest it (sustainably of course) from wild species. If you live in southern or central Ontario you can find field mint, Methna arvensis, and water mint, Mentha aquatica. Both species are usually only locally abundant, but when found are quite prolific. They like to hang around in damp meadows and along sunny stream edges.

I used Mentha arvensis that I collected this past summer when it was just coming into bloom. The taste is more pungent than spear or peppermint, but I find it more penetrating and medicinally potent. I find it quite earthy and comforting, ah yes! All true mints (Mentha species) can be used interchangeably for the purposes of treating a cold, and are applicable because they contain anti-spasmodic (muscle contraction or spasm reducing) and antibacterial properties and help the body to clear phlegm and mucus from the sinuses and lungs. Coughs and sore throats are also relieved by mint, if fact they have a significant capacity to heal the respiratory system. Indigestion, acid reflux, an even ulcers can be prevented and cured using this incredible group of aromatic plants.

Matricaria chamomilla

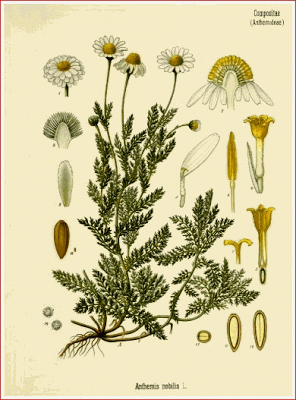
Chamomile: This low growing, whispy and fragrant herb, Matricaria chamomilla, has been used for countless centuries to relax and sedate the central nervous and digestive system, but aso has an important role to play involved with fighting respiratory illness. It is pain-relieving and anti-spasmodic like mint, but is also a potent anti-inflammatory that reduces the swelling and irritation in your sinuses and throat. Chamomile (occasionally spelled Camomile by a few eccentric individuals and distributors) is another widely available natural remedy that you could pick up in a variety of locations, although growing your own or sourcing from a reliable and trust-worthy source is always best! Chamomile’s time-honored calming affects also help someone with a cold to be able to sleep, which is extremely important when your body is using up energy fighting off an infection.

Garlic

Garlic: The potent chemicals found in this plant are completely undesirable to most bacteria, fungi and viruses and so can be used to disinfect the body internally as well as externally. Definitely throw in some extra garlic with whatever you are cooking for yourself when you are sick (which should include lots of easily digested and nutrient rich fresh fruit and vegetables. It also helps to eliminate dairy from your diet when you are sick, because it can enhance the production of mucus and may affect the immune system). I like to add borderline-insane amounts of garlic so that I can really feel it; certainly the more potent the better. Garlic also helps you to digest your food after it has passed through your throat to numb and heal inflamed throat tissue and relieve sinus congestion. I have found that eating a whole glove of garlic makes my stomach do somersaults, but if you can stomach eating raw garlic then all the power to you.

So that’s pretty much it; organic Apple cider vinegar, unpasteurized raw honey, powdered cayenne pepper, wild harvested mint, chamomile and garlic was all that my body needed to assist in expelling all of the symptoms, as well as the infection itself. All of these things are more or less very easy to come by and are extremely reliable. I couldn’t have hoped for being sick for a shorter period of time and now I know exactly how to treat myself using natural, safe and straight-forward ingredients. I encourage you to give it a shot, and to also explore other herbs and natural remedies that might work better for you. Everyone is different, and the only way to figure out what fits your needs best is to be creative, diversify and experimental!

Coffee Grinds to Mushrooms: A How to Guide

20 Feb

Yup. I’m not pulling your leg and I’m not kidding you around; oyster mushrooms (Pleurotus ostreatus) are a species of fungus that can digest coffee grinds, including the filters that they are often discarded with, and produce reliable crops of mushrooms. I was skeptical at first but after doing what seemed to be no more than a month casually searching through online do-it-yourself blogs and investigating companies which distribute mushroom kits and spawn (such as The Mushroom Patch) I had the confidence to give it a shot. I was rewarded with not only beautiful and tasty oyster mushrooms but an acquired set of skills that I can now use to develop further cultivating techniques for this sadly underappreciated crop.

Approximately one month after mixing together the coffee grinds and mycelium together, the oyster mushrooms are well into their first flush.

But why would you want to grow your own mushrooms? The most obvious part of it for me is that you are upcycling, which is the process of converting something that could be interpeted as useless into a new product or something of benifit. You are taking some coffee grinds, which most consider to be ready for the trash, and converting it into edible material. So you are really getting the best bang for your buck; especially since organic good coffee tends to be a little expensive. Might as well use it twice!

Plus you are not just creating any old edible material (Because edible material sounds really appetizing..) but oyster mushrooms, which are delicious and extremely good for you. You can read all about the specifics of nutrition and medicinal properties as well as learn some additional facts about oyster mushrooms here. All of that content could easily be a whole article on it’s own! It’s also pretty enjoyable to be growing a food crop indoors at any time of the year and to be rewarded with what is really, in the long run, minimal effort. Besides the materials and initial effort input it is sort of like just having another houseplant; one that produces something you can eat.

Step 1. Acquiring mycelium and coffee grinds

Chances are, there is a coffee shop near where you live. They are all over the place these days, and so a regular and abundant supply of coffee grinds is pretty easy to come by. My brother used to work at a Second Cup, and he managed to collect 2 garbage bags full of coffee grinds in only 3 days. All it takes is for you to make friends with someone who works at a coffee shop or inquire about it yourself. I have not gone this route since I had a close connection, but I am sure any coffee shop employee you approach will be willing to save some of the grinds for you. Most establishments have to pay to have their garbage dumpsters emptied, so by diverting some of that ‘garbage’ from filling up their bins I am sure they will be more than glad that you are helping them out.

Or, you could save up the coffee grinds yourself. This works well if you live with a whole bunch of people that are all coffee fiends. Pro tip: If you happen to be able to get some organic coffee, then you will naturally produce organic mushrooms. If you are going to go that route and are collecting your own coffee, try using unbleached filters to further improve the purity and quality of your oysters.

As for the mycelium, your only chance is to purchase it online from a company that distributes mushroom spores (referred to as spawn) unless you happen to know someone that you can get some spores from. I ordered mine from The Mushroom Patch and have been impressed with the results. Make sure to follow the instructions on the package to ensure you have healthy and happy spawn!

Step 2: Combining mycelium and coffee grinds

Now all you need is a bucket. It is possible to grow oyster mushrooms in bags (this is going to be my next project) but for the purpose of this guide I am just going to stick with what I know how to do. I use a 6 gallon bucket that I got at a wine supply shop and previously used to brew beer in. I ordered 5 lbs worth of oyster mushroom spores (spawn that was inoculated into a bag of sterilized barley and wheat husks). I had to wait 10 days or so once the spawn package arrived for the mycelium to spread evenly throughout the bag of grain, and it was actually quite the spectacle! and it is likely that you will have to wait a little while as well. This gives you some time to prepare everything else.

Keep in mind to be sanitary throughout this process: you want to try and limit the chances that any foreign mould or fungal spores might also take up residence in your bucket of coffee grinds and spawn. I sterilized the bucket using potassium metabisulphite, a common sterilizer that you can buy in cheap packets from any wine supply shop or home brewing store. I also sterilized my hands (by dipping them into the potassium and water mixture) before cutting open the bag of spawn and trying my best to delicately break apart the block of mycelium that had formed inside. But wait; what about sterilizing the coffee grinds? They have already been exposed to steam and boiling temperature water in the form of water vapor and as long as they had been stored in a clean sterile container (such as a clean and tied garbage bag) then they are perfectly safe and can be used without the need to sterilize them again.

My method of mixing the grinds and the spawn together was to place a layer of coffee grinds (filter and all) about 3-5 inches thick on the bottom of the bucket. I then sprinkled the grain spawn into the bucket; just enough to cover the surface of the grinds with an even layer. Then, on goes another 3-5 inch thick layer of coffee grinds. I repeated this, layer upon alternating layer, until I ran out of spawn. I made sure I would have enough of both ingredients to fill the bucket to within about 5-6 inches of the top rim. You don’t want to have your mushrooms growing from too deep inside your bucket; carbon dioxide is heavier than air and will settle on the surface of the established mycelium and cause the mushrooms to develop abnormally or reduce yields. You want the oysters to get good air circulation, so having them near the rim is a good idea. If you can’t get enough coffee grinds for a 5 gallon bucket, simply adapt to a smaller container.

Once your bucket/container is filled, stretch some plastic wrap over the opening. Make sure that the edges are tight; plastic wrap doesn’t like to stick to plastic buckets so I had to reinforce mine by tying a shoelace around the bucket and tucking the plastic wrap under it. Now poke some holes in the plastic wrap; I spaced them sporatically and made them about an inch or so wide. This allows for some air circulation but mainly maintains moisture and humidity. You don’t need to water your mushrooms either, there is enough moisture in the coffee grinds to sustain the mycelium until they begin to fruit and then you start misting them. Sorry I don’t have any photos of this whole construction process, although I think everything is pretty straight forward. Comment below if you have any questions!

Step 3: Encouraging your mushrooms to fruit

Similar to gardening, patience is a key virtue when cultivating oyster mushrooms. After mixing the coffee grinds and spawn together, you will need to wait around 2 to 2 and a half weeks for the mycelium to consume all of the coffee grinds. While this was happening, I kept the bucket (covered in the perforated plastic wrap) in the relatively cool and dark basement. Once the mycelium really got going, I moved the bucket upstairs to the comparatively warmer conditions near the window which exposed them to indirect sunlight. The bucket was also near, but not too close, to a heating vent which provided them with warmer temperatures and therefore better growing conditions. The ideal fruiting temperature for oyster mushrooms is between 60-75 degrees F, so around 17-23 degrees C. In other words, room temperature is ideal.

Around 2 weeks after mixing, the mycelium has almost engulfed the entire mass of the coffee grinds. Once it does, the surface of the mycelium will harden, glisten when misted and turn off-white or yellowish in color. (Refer to photo 1)

It honestly did not take very much to encourage the mycelium to begin growing, the oyster mushrooms once mixed in with their substrate pretty much took care of themselves and have required what I would describe as minimal attention. It’s important to still keep an eye on them: watch out for mould  growth. I had a little bit (and still do) but as long as the patches don’t get too large then they shouldn’t threaten the health of the mycelium.

Step 4: When your mushrooms start fruiting

Around a week or so after the mycelium took over the entire surface of the bucket, I noticed strange looking growths occurring on the edges of the bucket where a gap had formed between the mass of mycelium and coffee grinds and the edge of the bucket. This shrinking is normal; since the mushrooms are digesting the coffee grinds it will shrink and pull away from the side of the bucket. These growths reminded me of ocean polyps or constricted heads of cauliflower. These are infant oyster mushrooms and are a sign that you have your very first flush of tasty treats on the way!

Once you start to see these patches forming (there should be quite a lot of them), remove the plastic wrap covering the top of the bucket. It is now time for you to start providing the mycelium with additional moisture which it will need to grow and develop into healthy oyster mushrooms. In order to do this, you should mist the mushrooms anywhere from 3-4 times a day using a spray bottle. It is VERY IMPORTANT that you use either rain water, melted snow, or BOILED and cooled tap water. If you use regular tap water that has not been boiled, the chlorine, flouride, and other chemical contaminants in the tap water could reduce yields or prevent them altogether. So make sure that you are giving the mycelium the type of water that they need! Well water will work too, since it is derived from ground or rain water that hopefully doesn’t have any chemical contaminants in it. Mist the mushrooms enough to make the surface of the mycelium glisten; too much water that pools on the surface is probably bad.

I have been using boiled tap water, and it seems to be fine. An alternative to this would be collect buckets of snow and bringing them inside to melt and then simply pouring this water into your spray bottle. Try your best to keep the mistings consistent, although this is sometimes difficult unless all you ever do is sit at home. Just try your best; the more love than you can provide for your mycelium the more they will reward you with larger and more numerous clusters of oyster mushrooms. Within a week of misting and growing, you will notice that not all of the small cauliflower-polyp patches have developed. This is also to be expected; oyster mushrooms always tend to produce more mushrooms than they can afford to grow into maturity. This is a security measure developed in order to ensure that at least a few of the clusters will survive undamaged long enough to perform the task of reproduction.

Step 5: Harvesting and processing your oyster mushrooms

Freshly harvested oysters, at their peak of ripeness, ready for cooking and eating.

Freshly harvested oyster mushrooms. Note that the edges of the caps are only slightly browning; this is the perfect time to pick them.

You will likely be impressed as how quickly the mushrooms develop, I most certainly was. I would estimate that the time from when you first noticed the immature growths to when you are eating mature mushrooms is around 5-10 days. The mushrooms are mature when growth slows and the edges of the caps begin to turn brownish. Once you notice this, harvest the mushrooms immediately since at this stage all they will do is start to dry and out and deteriorate. Even if you are not going to use them right away, harvest them. I find the best way to harvest them is to cut the mushrooms, as close to the base of the group as possible, with a serrated knife. If you want to be extra sanitary you could sterilise the knife, although I have found this isn’t completely necessary. Try not to damage the surface of the mycelial mat although it’s not disastrous if it happens; just probably a good idea to try and limit potential entry points for adventitious mould growth.

Also, all of the mushroom patches are not all going to mature at the same time, so you may be harvesting mushrooms for 2-4 days during a flush. After you harvest all of the patches and there is no more immature growth, you should try to remove any underdeveloped clusters. These will just continue to shrivel and get mouldy. They can be removed with your hands, and it’s a good idea to remove them before they start to mould. They do get easier to remove when they begin to dry but don’t neglect the task for too long. If you notice any mould developing at any point, just pick it off to prevent it from spreading.

Once you have collected the mature mushrooms from the bucket, rinse them in cool water and cook right away (Only rinse your mushrooms if you are going to use them right away). As a side note, oyster mushrooms have to be cooked to be eaten, unlike the common button/cremini/portabello mushrooms (All different cultivated versions of the same species Agaricus bisporus) as they contain heat-sensitive toxins that are destroyed by frying/boiling/baking etc. They can also be stored, unwashed, wrapped in a slightly moist paper towel in a paper bag in the fridge for a week or slightly longer. Drying them is also possible; and you can read about how to do that here. They can also be frozen, but when thawed tend to be moist and soggy. I would recommend freezing them only if you plan on using them to make soup later, since they will be cooked and moistened anyways!

Same cluster of mushrooms as above, cut lengthwise and ready  to be fried, baked, or boiled in soup or stew. Delicious!

Same cluster of mushrooms as above, cut lengthwise and ready to be fried, baked, or boiled in soup or stew. Delicious! The caps are most tender parts, and the lower stems are firm and chewy.

When you harvest the mushrooms, usually the gills and wavy caps are the most tender and tasty sections. Near the base of the cluster, the stem is chewy. I like to cut the base off and freeze it in in a container in order to add this to stock when I am making soup. This way, all the nutrients and flavour of the base is still used and absorbed into the stock. The bases can also be saved and used to clonally propagate new patches of mushrooms; but this is for another article for a another time (I am in the process of trying different methods of performing this task and will make a follow up to this post once I find the best method!)

Step 6: How to encourage your mushrooms to fruit again

Once your oyster mushrooms have stopped producing clusters, it is time to let them rest and regain their strength for the next fruiting period. After I harvested the last cluster, I misted the top of the mycelium one last time and replaced the plastic wrap on the top of the bucket with new sheets and, same as before, punched some holes through them to keep in humidity but still allow for some air circulation. I then moved the bucket back to a cooler and darker location in the basement to allow the mycelium to rest and store up nutrients for another flush. I only had to wait about a week and a half of the mycelium being inactive before I started to see more immature growth develop along the edges of the surface as I had observed with the fist flush. As always, keep an eye on the mushrooms so that you notice when they start fruiting again early enough to begin misting and give your next batch a healthy start.

From here on in, it’s just a matter of allowing your mycelium to rest and fruit, over and over until the kit is finished. For me, the first flush produces the largest mushrooms and they become slightly smaller, although no less numerous, each round. Although, I have read accounts of the first flush producing a ton of small mushrooms followed by larger and less prolific crops, so I suppose it would be appropriate to expect anything. I am not sure how many fruits to expect out of a 5 gallon batch (considering mine is resting in between it’s second and third flushes) although I am estimating at least 5 or 6 given the size of the whole thing. Eventually, your mycelium will eventually run out of steam and stop producing. I am not sure how to recognize this stage (other then it never producing any more mushrooms) but I would imagine the mass of mycelium would be shriveled up, considerably smaller than when you started the batch and possibly quite discolored. I have read that these leftovers make excellent garden fertilizer, so even from start to finish this entire procedure has produced absolutely no waste.

As with most do-it yourself stuff, there is a practically endless assortment of variables to take into consideration and since everyone’s indoor environment is slightly different, times and yields may vary according to these mostly unpredictable circumstances. However, I guarantee that growing your own oyster mushrooms in coffee grinds is definitely worth while and totally worth investigating in! After the initial investment of purchasing the spawn, oyster mushrooms can almost be endlessly propagated using tissue-culture techniques that are far less complicated than one might expect (stay tuned for a follow-up post!).

You have so much to gain from growing your own tasty mushrooms too: growing mushrooms has helped me to develop an even greater respect for the importance of not only locally grown food as well as understanding how important it is to develop skills to be responsible for your own food source. One develops a completely different attitude towards the living world and yourself when you begin to cultivate what it is that sustains you at such as basic and fundamental level. I wish everyone the best of luck with this endeavor and hope that this sort of holistic and ancient knowledge gets past down from friend to friend, parents to child, and that that each of us can rekindle these sorts of skills which are essential for an ever growing independent and ecologically self-responsible life style. Thanks for reading and happy mushroom growing!